Xero Integration
Synchronize invoices. Simplify accounting.
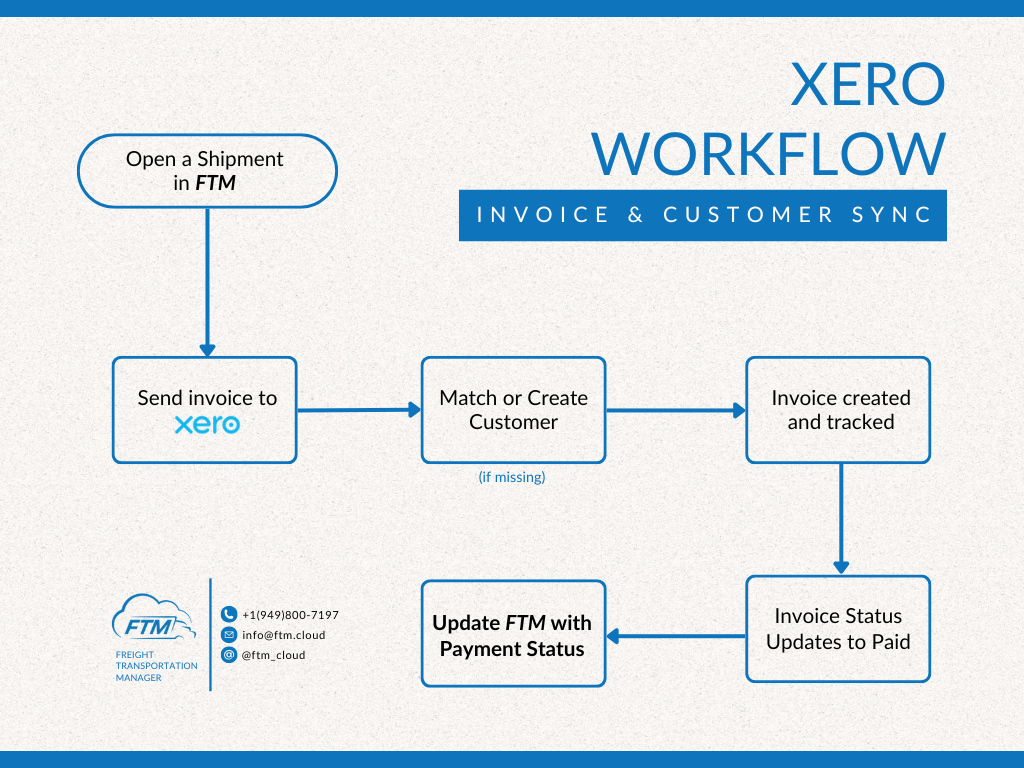
FTM’s integration with Xero automates the flow of financial data between your TMS and your accounting system. It allows brokers and admins to send invoices, sync payments, and manage customers, all directly from Salesforce.
Benefits of Xero Integration
- Send invoices to Xero directly from Salesforce
- Track payment status in real-time
- Automatically match FTM Customers with Xero Contacts
- Secure integration using OAuth 2.0
- Field mapping and ID tracking included
Prerequisites
Before beginning, ensure the following:
- A Xero business account with developer access
- Admin access to Salesforce (FTM)
- API Client ID and Secret from Xero
- Connected App created in Salesforce
- Xero integration package installed (if provided)
Sandbox Access
To test before going live:
- URL: https://test.salesforce.com
- Username: [email protected]
- Password: EXAMPLE0123456789
Step-by-Step Setup
1. Required Fields
Add the following fields to your Customer and Invoice objects.
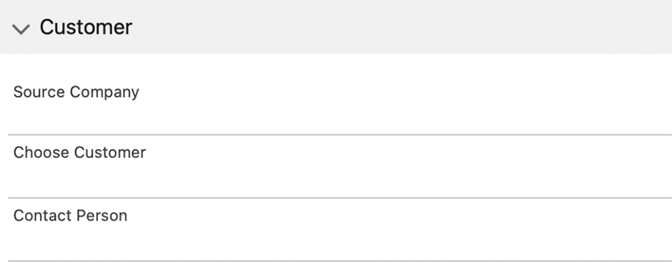
Customer:
- Xero_Contact_ID__c
- Xero_Account_ID__c
Invoice:
- Xero_Invoice_ID__c
- Xero_Status__c
- Invoice_PDF_Link__c
2. Name Credentials
Set up secure API access.
- Go to: Setup > Name Credentials
- Label: XeroAPI
- URL: https://api.xero.com
- Identity Type: Named Principal
- Authentication Protocol: OAuth 2.0
3. Connected Apps
To allow OAuth-based access:
- Go to: Setup > App Manager > New Connected App
- Add:
- OAuth scopes: open id, profile, email, accounting.transactions, offline_access
- Enable OAuth and set callback URL from Xero dashboard
4. OAuth Configuration
FTM uses client credentials flow with Xero.
- Use client_id and client_secret provided by Xero
- Token URL: https://identity.xero.com/connect/token
- Authorization URL: https://login.xero.com/identity/connect/authorize
5. Flow or Process Builder
Set up automation to trigger invoice syncing:
- Trigger: New invoice created or status updated
- Actions:
- Call Xero API
- Update Xero_Status__c field with response
- Save returned Xero_Invoice_ID__c
6. Buttons / Layout Setup
Add the Sync to Xero button to the Invoice object layout.
- Navigate to: Invoice > Page Layout
- Drag the button to the appropriate section
- Ensure fields like Invoice Status and Xero Invoice ID are visible
7. Sharing Settings
Grant access to the Invoice and Customer objects:
- Navigate to Setup > Sharing Settings
- Ensure public read/write for system users or create sharing rules for Xero-integrated users
8. APEX & VFP Code
📎 Please upload the APEX/VFP files for:
- XeroIntegration.cls – handles API calls
- XeroSyncTrigger.trigger – automation for syncing
- Test_XeroIntegration.cls – test class for deployment
These files will be downloadable in the published guide.
Testing the Integration
To test your setup:
- Create a Customer and Invoice in FTM
- Click Sync to Xero
- Confirm that the invoice appears in Xero
- Check if payment status updates automatically
Tip: Use debug logs to verify API calls and responses.
Troubleshooting
- Invoice not syncing?
- Check API limits on Xero side
- Confirm required fields (customer ID, invoice total) are filled
- OAuth token error?
- Recheck client ID/secret
- Make sure token endpoint URL is correct
Sync Xero to Salesforce
Stay updated automatically
While the standard integration sends data from Salesforce to Xero, this section covers the reverse syncing from Xero to Salesforce using a secure webhook. This ensures that when updates occur in Xero (such as payment status changes or new invoices), your Salesforce records reflect those changes automatically.
How It Works
Xero supports outgoing webhooks through its developer platform. When an event occurs in Xero (e.g. invoice updated, payment recorded), it can trigger a POST request to your custom Salesforce endpoint. This allows real-time syncing of financial data without manual refreshes.
Step-by-Step Setup
1. Create a Custom Apex REST Endpoint in Salesforce
Create an Apex class in Salesforce to receive incoming data from Xero.
Example class: XeroWebhookHandler.cls
@RestResource(urlMapping='/XeroWebhook')
global with sharing class XeroWebhookHandler {
@HttpPost
global static void handleRequest() {
RestRequest req = RestContext.request;
String body = req.requestBody.toString();
// Parse and log the incoming JSON
System.debug('Xero Webhook Payload: ' + body);
// Parse JSON and update the corresponding Salesforce record
// You can extract Xero invoice ID and update your custom object
}
}
You must attach this code as a file (XeroWebhookHandler.cls) when publishing.
2. Deploy Test Class for Validation
Include a test class (e.g., Test_XeroWebhook.cls) to support deployment and testing.
3. Create a Named Credential
Navigate to:
Setup → Named Credentials
- Label: XeroWebhookAuth
- Type: Anonymous (or OAuth if you secure incoming calls)
- Endpoint: Your Salesforce domain
4. Register Webhook in Xero Developer Portal
Log in to developer.xero.com:
- Go to your app → Webhooks
- Add webhook URL:
https://yourdomain.my.salesforce.com/services/apexrest/XeroWebhook - Choose events to listen for:
- Invoice updated
- Payment created
- Contact updated
- Save and verify
5. Test the Webhook
- In Xero, modify an invoice or payment
- Confirm a POST is sent to Salesforce
- Monitor Debug Logs in Salesforce to verify data received
- Update Salesforce records based on payload
Notes
- Webhook requests from Xero are signed. You may implement verification for additional security.
- Always use field-level validation in Apex to prevent unwanted overwrites.
Going Live
Once testing is complete:
- Use production credentials from Xero
- Switch Name Credentials and endpoints to production
- Confirm all record types and flows are enabled
- Monitor invoices via debug logs and Xero dashboard
Need Help?
We’re here to help you connect your accounting with your operations.
📩 Contact us at [email protected] for implementation assistance or troubleshooting.