Truckstop Integration Guide
Streamline your load posting workflow with one-click posting to Truckstop and visibility into posted loads directly inside FTM.
Overview
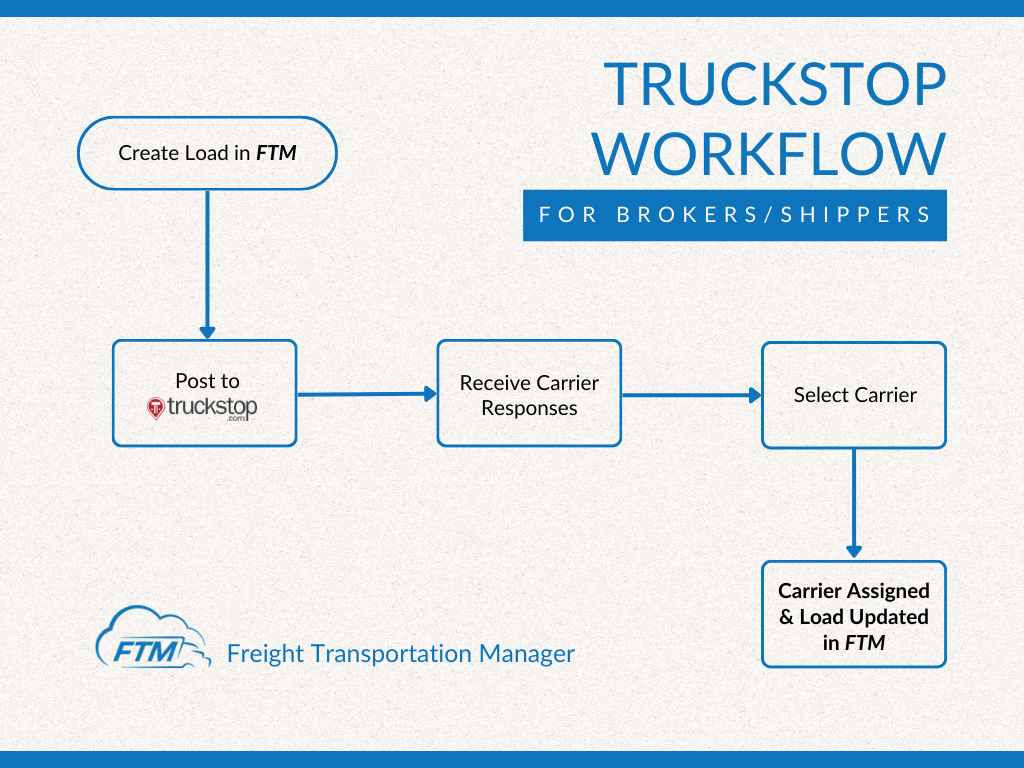
The Truckstop integration allows FTM users (primarily carriers/dispatchers) to:
- Post an FTM load to Truckstop from inside Salesforce/FTM.
- View a list of Truckstop loads from within the same interface.
- Support both real API mode (via Named Credentials) and mock mode (for development/testing).
This integration connects FTM with Truckstop via a Salesforce Named Credential (Truckstop_Integration_Credentials) to securely call Truckstop endpoints using HTTP callouts.
1⃣ User Information: What This Integration Does
Purpose
The Truckstop integration enables dispatchers to post loads to Truckstop without leaving FTM and immediately confirm success/failure. It also provides an embedded list of available Truckstop loads for quick reference.
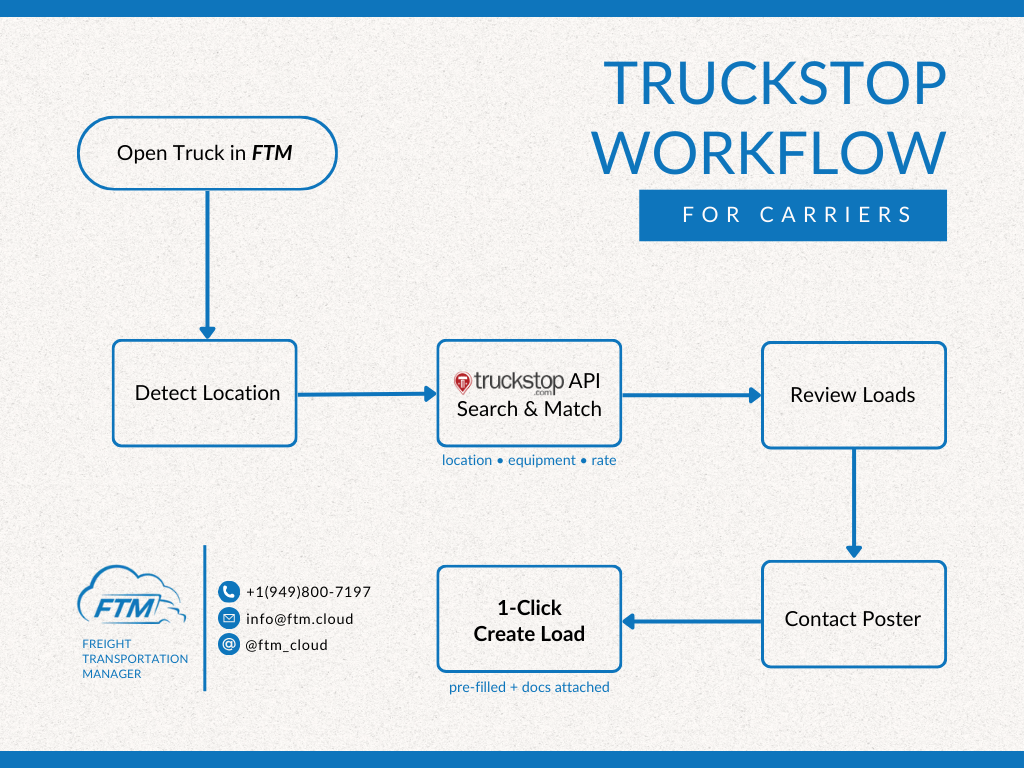
User Workflow
- Dispatcher opens a Load record in FTM (Salesforce).
- Dispatcher clicks “Post Load to Truckstop”.
- System sends the load payload to Truckstop using an API callout.
- System displays a success or error message in the page.
- System refreshes the Truckstop Loads table to show the latest list.
Key Features
- One-click posting of a Load to Truckstop from FTM.
- Uses Named Credentials for secure authentication and endpoint management.
- Displays a live (or mock) Truckstop load list in a Visualforce UI.
- Supports mock mode when credentials are not configured (safe for dev/test).
2⃣ Developer Information: How It Works in Salesforce
Apex Components
| Component | Purpose |
TruckstopIntegration | Core integration class that posts a load and fetches load list from Truckstop |
TruckstopVFController | Visualforce controller extension that posts load + loads Truckstop list |
| Visualforce Page | UI button to post load and table to display Truckstop loads |
1. API Integration
A) Named Credential
The integration expects a Named Credential with the exact name:
Truckstop_Integration_Credentials
This Named Credential is referenced in callouts like:
callout:Truckstop_Integration_Credentials/submitcallout:Truckstop_Integration_Credentials/loads
Where it is used
- POST /submit → submit a load to Truckstop
- GET /loads → fetch list of Truckstop loads
Note: /loads endpoint is currently used as a “list loads” endpoint assumption in code.
B) Real Mode vs Mock Mode
The code determines whether the account is “active” by checking:
Schema.getGlobalDescribe().containsKey(‘Truckstop_Integration_Credentials’);
- If it evaluates to true → real callouts execute.
- If it evaluates to false → mock responses are returned.
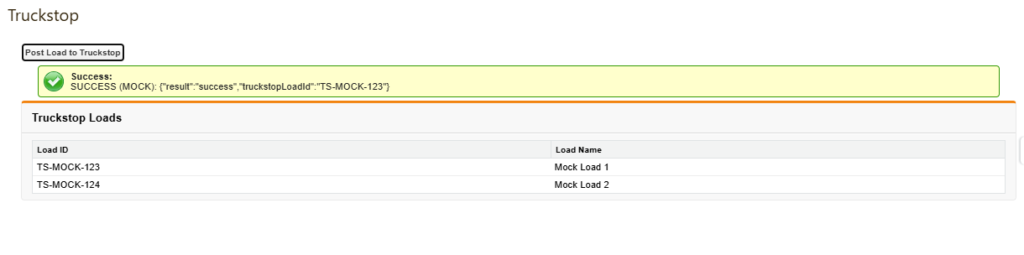
Mock responses
- Post Load returns:
SUCCESS (MOCK):
{"result":"success","truckstopLoadId":"TS-MOCK-123"}
- Load list returns two sample items:
TS-MOCK-123 / Mock Load 1TS-MOCK-124 / Mock Load 2
2. Apex: Posting a Load
Method
TruckstopIntegration.postLoad(FreightTM__Load__c load)
Endpoint
callout:Truckstop_Integration_Credentials/submit
Request
- Method:
POST - Header:
Content-Type: application/json - Body:
JSON.serialize(load)
Response Handling
- If HTTP status is 200:
- returns:
SUCCESS (REAL): <body>
- returns:
- Otherwise:
- returns:
ERROR (REAL): <body>
- returns:
This returned message is displayed to the user in the Visualforce page via ApexPages.addMessage().
3. Apex: Fetching Truckstop Loads
Method
TruckstopIntegration.getTruckstopLoads()
Endpoint
callout:Truckstop_Integration_Credentials/loads
Request
- Method:
GET
Response Handling
If status is 200, the integration expects a JSON response shaped like:
[
{ “id”: “…”, “name”: “…” },
{ “id”: “…”, “name”: “…” }
]
It parses the list and maps each row into:
idname
Returned type:List<Map<String,String>>
4. Visualforce UI
Visualforce Controller Extension
TruckstopVFController
Behavior
- Loads the current Load record from standard controller.
- On page load:
- calls
TruckstopIntegration.getTruckstopLoads()
- calls
- On “Post Load” button click:
- calls
TruckstopIntegration.postLoad(load) - shows message
- refreshes the Truckstop loads table
- calls
Visualforce Page
Features
- Button: Post Load to Truckstop
- Table: Truckstop Loads (Load ID + Load Name)
- Page messages region for success/error text
5. Field Mapping
Current Implementation
The integration posts:
JSON.serialize(load)(the fullFreightTM__Load__crecord)
Implication
Truckstop must accept the Salesforce Load JSON shape, or your Named Credential endpoint must point to a middleware that translates Salesforce fields → Truckstop’s expected schema.
If Truckstop requires a strict schema, you should implement a mapping layer similar to DAT (build a request Map and serialize that instead of serializing the whole sObject).
6. Error Handling
| Condition | Outcome |
| Named Credential missing / not configured | Mock response is returned (safe dev mode) |
| HTTP status != 200 | User sees “ERROR (REAL): …” |
| GET loads fails / non-200 | No loads added (table may show empty or mock list depending on mode) |
7. Testing & Deployment
A) Mock Mode (no Named Credential)
- Deploy code and Visualforce page.
- Open any Load record.
- Click Post Load to Truckstop.
- Confirm:
- Success message shows mock Truckstop load ID
- Loads table shows two mock loads
B) Real Mode (Named Credential configured)
- Create Named Credential:
- Name:
Truckstop_Integration_Credentials - URL: Truckstop API base (or middleware base)
- Auth: per your Truckstop setup (OAuth/basic/token/etc.)
- Name:
- Open a Load record and click Post Load to Truckstop.
- Verify:
- HTTP 200 returns “SUCCESS (REAL)”
- Table refresh shows real load list (assuming
/loadsendpoint returns expected JSON)
FAQs
Q: Does this integration support updating or deleting Truckstop postings?
Not in the current code. It supports posting and listing loads only.
Q: Can we filter Truckstop load search like DAT?
Not implemented here. The current GET /loads fetches whatever the endpoint returns.
Q: Why is there a mock mode?
To allow development/testing without credentials or real API connectivity.
Q: Where is authentication handled?
By the Salesforce Named Credential, keeping credentials out of Apex code.
Support
For setup help or troubleshooting, email: [email protected]